- Meet Our Illuminaries
- Discussions & Help
- Gallery
- Learn With Canon
- About Our Community
- Meet Our Illuminaries
- Discussions & Help
- Gallery
- Learn With Canon
- About Our Community
- Canon Community
- Discussions & Help
- Camera
- EOS DSLR & Mirrorless Cameras
- EOS T6 Trouble with bracketing
- Subscribe to RSS Feed
- Mark Topic as New
- Mark Topic as Read
- Float this Topic for Current User
- Bookmark
- Subscribe
- Mute
- Printer Friendly Page
EOS T6 Trouble with bracketing
- Mark as New
- Bookmark
- Subscribe
- Mute
- Subscribe to RSS Feed
- Permalink
- Report Inappropriate Content
09-27-2023
06:00 PM
- last edited on
09-27-2023
06:03 PM
by
Tiffany
Hey! I have an EOS Rebel T6 and I'm trying to use exposure bracketing. I've looked through multiple manuals, have watched many instructional videos and asked people who have had more experience with cameras how to and everything I have tried, failed. I always end up with one very underexposed or overexposed, blurry picture and I followed every direction I was given. I would like to know if there's something I'm missing or if my camera could potentially have something wrong with it.
- Mark as New
- Bookmark
- Subscribe
- Mute
- Subscribe to RSS Feed
- Permalink
- Report Inappropriate Content
09-29-2023 12:02 PM
" I only seem to end up with one picture that is too bright or too dark."
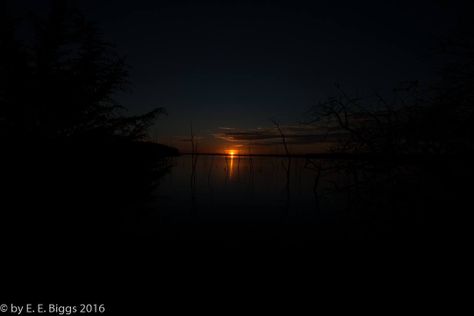
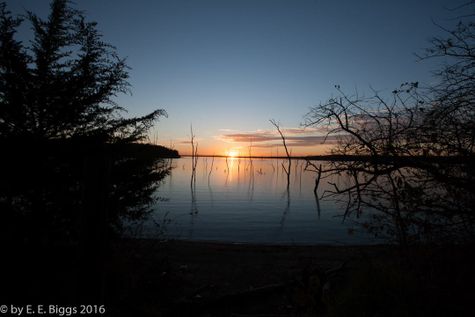
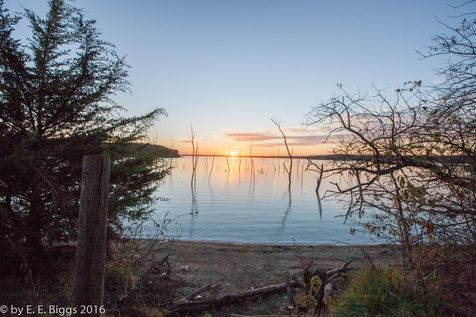
Here is a typical three exposure bracket and since we are talking sunsets.
... which yields this final image.
zakslm,
A critical suggestion. Backoff the sliders in your editor a bit. Remember in photography editing, less is more. Let the HDR do its thing.
EOS 1DX and many lenses.
- Mark as New
- Bookmark
- Subscribe
- Mute
- Subscribe to RSS Feed
- Permalink
- Report Inappropriate Content
09-30-2023 09:38 PM
Okay! I tried a few different methods that all pf you had suggested and finally got it to bracket! I put the camera on a tripod, went to the menu and went in the AEB settings, kept the middle at 0 and the other two lines about 3 ticks away from the middle, put the shutter timer on 2 sec, changed my ISO to fit the picture I was taking and pressed the shutter 3 times and it finally gave me 3 bracketed photos! Thank you for your advice!
- Mark as New
- Bookmark
- Subscribe
- Mute
- Subscribe to RSS Feed
- Permalink
- Report Inappropriate Content
09-30-2023 09:39 PM
I haven't thought of taking blank images in between, I'll try that and see what it can do. Thank you!
- Mark as New
- Bookmark
- Subscribe
- Mute
- Subscribe to RSS Feed
- Permalink
- Report Inappropriate Content
09-30-2023 09:45 PM
Thank you for your advice! I'll try it to see what it will do for my camera! That's a really nice picture!
- Mark as New
- Bookmark
- Subscribe
- Mute
- Subscribe to RSS Feed
- Permalink
- Report Inappropriate Content
10-01-2023 12:40 AM - edited 10-01-2023 12:44 AM
ebiggs1,
I understand about backing off the sliders, but not the HDR part.
To the best of my knowledge, there was no HDR. The shot you see is the - 1 2/3 exposure - in my opinion the most dramatic of the 3 bracketed shots (slightly punching up the saturation and colors) but not getting too crazy. Sunsets in Arizona this time of year can be pretty spectacular.
- Mark as New
- Bookmark
- Subscribe
- Mute
- Subscribe to RSS Feed
- Permalink
- Report Inappropriate Content
10-01-2023 01:26 AM
@zakslm wrote:I understand about backing off the sliders, but not the HDR part.
To the best of my knowledge, there was no HDR. The shot you see is the - 1 2/3 exposure - in my opinion the most dramatic of the 3 bracketed shots (slightly punching up the saturation and colors) but not getting too crazy. Sunsets in Arizona this time of year can be pretty spectacular.
You have to use a program to combine the three exposures that you captured. I recommend downloading, or if you have it, using Canons Digital Photo Professional 4 (DPP 4). You will load the three exposures in DPP 4, select them, then click the Tools pulldown and select "Start HDR compositing tool" or press CNTL Y at the same time on your keyboard. You will then get a panel with your images thumbnails and get some options on how you want to proceed. After you have made your selections you can combine your three images into an HDR image.
Newton
- Mark as New
- Bookmark
- Subscribe
- Mute
- Subscribe to RSS Feed
- Permalink
- Report Inappropriate Content
10-01-2023 01:31 AM
@K-Emery wrote:"and pressed the shutter 3 times and it finally gave me 3 bracketed photos!"
Although you can press three times, you shouldn't have to.
Here is page 119 from your T6 users manual. You may also want to visit page 118.
Newton
- Mark as New
- Bookmark
- Subscribe
- Mute
- Subscribe to RSS Feed
- Permalink
- Report Inappropriate Content
10-01-2023 11:40 AM
Perhaps a definition of "bracketing" is necessary so we all know what we are talking about.
Bracketing is when you take usually an odd number of photos one under exposed by a stop, one correct exposure and one over exposed by a stop. Now for sure there are many other variables you can use in bracketing but this is a common way. After you merge all three into one final image. Supposedly it gives the best of everything exposure wise. But you still must use careful adjustment using the various sliders in the editor or you get a comic book picture look.
Here is an example where HDR made a photo possible. The DR in this photo far exceeded the cameras ability but with three exposures it is easy.
EOS 1DX and many lenses.
- Mark as New
- Bookmark
- Subscribe
- Mute
- Subscribe to RSS Feed
- Permalink
- Report Inappropriate Content
10-01-2023 12:42 PM - edited 10-01-2023 01:00 PM
FloridaDrafter,
Good to know! I have DPP 4 on one of my computers but have only used it a few times when I was experimenting with shooting RAW an editing/doing post with DPP 4.
I did not know DPP4 does HDR compositing. Looks like there is a good reason to make sure the program is up to date and may start using it again. As time allows, I'll try auto-bracketing in continuous and HDR compositing in DPP 4.
The bracketing I've "experimented" with was done in single shot and not continuous, because quite frankly, I didn't think to do so. Most of my shooting is Single Shot, except for occasionally using a Creative Mode that has continuous shooting as part of the setup (i.e. Sports Mode).
Except when experimenting with shooting in Raw mode, I shoot in the default JPEG mode which is JPEG 24M 6000 X 4000 (on my T7) and copy the photos from the SD Card to my PC where I edit them in the Photo Editor that is part of Windows 10. Microsoft recently updated Photo Editor and to be honest, I preferred the previous version over the current version but perhaps I have to use it more and become accustomed to it but may switch to some other photo editor for JPEGs.
Thanks for the advice!
- Mark as New
- Bookmark
- Subscribe
- Mute
- Subscribe to RSS Feed
- Permalink
- Report Inappropriate Content
10-02-2023 11:08 AM
If you are getting into photo editing you are putting severe limitations on how much you can edit if you don't shoot raw. The camera deletes any data it sees as not important in jpg. Plus edits can be destructive in jpg, they are not in raw.
EOS 1DX and many lenses.
12/18/2025: New firmware updates are available.
12/15/2025: New firmware update available for EOS C50 - Version 1.0.1.1
11/20/2025: New firmware updates are available.
EOS R5 Mark II - Version 1.2.0
PowerShot G7 X Mark III - Version 1.4.0
PowerShot SX740 HS - Version 1.0.2
10/21/2025: Service Notice: To Users of the Compact Digital Camera PowerShot V1
10/15/2025: New firmware updates are available.
Speedlite EL-5 - Version 1.2.0
Speedlite EL-1 - Version 1.1.0
Speedlite Transmitter ST-E10 - Version 1.2.0
07/28/2025: Notice of Free Repair Service for the Mirrorless Camera EOS R50 (Black)
7/17/2025: New firmware updates are available.
05/21/2025: New firmware update available for EOS C500 Mark II - Version 1.1.5.1
02/20/2025: New firmware updates are available.
RF70-200mm F2.8 L IS USM Z - Version 1.0.6
RF24-105mm F2.8 L IS USM Z - Version 1.0.9
RF100-300mm F2.8 L IS USM - Version 1.0.8
- EOS M50 Mark II - flash stopped working in EOS DSLR & Mirrorless Cameras
- Trouble with focusing using Canon SX70HS in Point & Shoot Digital Cameras
- Trouble getting EOS 90D to work with Hollyland Pyro S 4K transmitter in Camera Accessories
- RF 100-500mm F4.5-7.1 L IS USM, Auto Focus focuses too close in EF & RF Lenses
- Trouble loading PowerShot SD 1300 IS to new Windows 11 desktop in Point & Shoot Digital Cameras
Canon U.S.A Inc. All Rights Reserved. Reproduction in whole or part without permission is prohibited.


