- Canon Community
- Discussions & Help
- Camera
- EOS DSLR & Mirrorless Cameras
- Re: Logic of HDR for photos with dark and bright ...
- Subscribe to RSS Feed
- Mark Topic as New
- Mark Topic as Read
- Float this Topic for Current User
- Bookmark
- Subscribe
- Mute
- Printer Friendly Page
Logic of HDR for photos with dark and bright areas
- Mark as New
- Bookmark
- Subscribe
- Mute
- Subscribe to RSS Feed
- Permalink
- Report Inappropriate Content
01-22-2014 07:17 PM
Hi, I wondered if someone could help with something that puzzles me about photographing with HDR (I’m just learning about DSLR after getting a Canon6D). I see the concept of 3 shots, one underexposed, one over exposed and the camera combining. But to me if you combine the two bright and dark extremes together you are back with the end result of a middle average like the middle exposure photo that had areas too dark and too bright.
In other words, if you feel part of your scene is too bright, to me it seems that by taking a second photo correcting it a bit, but also a third where you make it worse, the merger average takes it back to square one.
Or, is it the case that rather than overlaying the whole underexposed image on to the whole overexposed one as I’ve described, is the camera instead effectively taking the best of the 3 versions of the brighter area of the image and the best version of the darker area and combining them, like effectively sort of “stitching”.
In the field, the example I’ve had is photos of narrow canyons where the bottom of the canyon has no direct sunlight so to the eye the walls are brown and patterned, and higher up they are glowing orange cliffs thanks to reflected light, and then you see higher brighter cliffs towering up in the direct sun hundreds of feet higher.
However taking this photo it’s not what you get. Then the bottom of the canyon comes out pretty dark without its brown colour and walls are almost black, meanwhile the top is pretty bleached out and loses its lovely deep orange which becomes very pale and may even be just white.
If I were to expose correctly for the bottom to make it look nice, the problem is that the higher walls actually disappear in the highlight glare. But if I expose on the top of the cliffs in order to reveal the full height of the canyon and keep their real colour, the bottom becomes just a silhouette or even black.
Now I’ve read about HDR’s 3 versions. But if I get the too dark bottom and then combine a 2nd version that makes it better with a 3rd version where it’s been made even worse, does it not just average out somewhere back in the middle that I wasn’t too happy with at the start. And the same with bits that were a bit too bright before using the HDR.
Or have I misunderstood the capability of HDR and it actually ignores the photo areas where you’ve darkened the too dark bits and the other one where the too bright bits have been further brightened, and it is capable of combining just the improved versions of the two extreme halves of the image
- Mark as New
- Bookmark
- Subscribe
- Mute
- Subscribe to RSS Feed
- Permalink
- Report Inappropriate Content
01-22-2014 08:03 PM - edited 01-22-2014 08:09 PM
The idea of it is to combine the best areas from each exposure to make one with the too bright & too dark areas corrected through using areas from the differing exposures. This may explain it doing it the way it began & is more precise.
http://www.luminous-landscape.com/tutorials/hdr_workflow_for_the_rest_of_us.shtml
http://www.luminous-landscape.com/tutorials/hdr.shtml
- Mark as New
- Bookmark
- Subscribe
- Mute
- Subscribe to RSS Feed
- Permalink
- Report Inappropriate Content
01-22-2014 10:52 PM
The "whole" image isn't actually overlaid.
What I'm about to describe is really an over-simplification... but it should help make the concept easy to understand.
If we take the tonal range of an image... the blackest black all the way through to the whitest white and every level in between... let's suppose that we clump all those levels (in a 14-bit channel there are over 16000 of them) into just three major groups. We'll call them dark, medium, and light.
Shoot three images of a subject. One image is exposed as best as possible as if it were just going to be a single image. We'll take two additional images... one is overexposed by a stop and the other is underexposed by a stop. (In reality there may be more than just 3 images and the difference between images may be more than 1 stop.)
The computer software can analyze each pixel in the original image and decide if it's brightness level falls into the dark, medium, or bright category.
- If that pixel falls into the medium category then we leave it alone... we use the pixel from the middle exposure.
- If that pixels falls into the "bright" category, then we actually substitute the same corresponding pixel from the deliberately underexposed version of the image. (where that pixel would actually be less bright)
- If that pixels falls into the "dark" category, then we actually substitute the same corresponding pixel from the deliberately overexposed version of the image.
There is a little more to it than this... in reality there's more levels than just three and we can create blended pixels (if the pixel is a "little bright" (but not "really bright") then maybe we use a weighted bias between the original and dark versions -- you get the idea (otherwise you'd see very obvious points where the brightness just jumps rather than a smoother blending that looks natural.
Does that help?
There is a side-effect of HDR and that is that you can get some fairly wonky looking results depending on how you handle tone mapping. This can create a fairly surreal (not natural looking) result. Some people like this. Others think of it as "over-cooked" and dislike it.
5D III, 5D IV, 60Da
- Mark as New
- Bookmark
- Subscribe
- Mute
- Subscribe to RSS Feed
- Permalink
- Report Inappropriate Content
01-24-2014 07:39 PM
Thanks for taking the trouble to reply.
Wow, I didn't realise the camera was clever enough to select the best of the three exposures for each separate area of the image and ignore the other exposures. However, just to clarify Tim, I was only talking about HDR within the camera. My Canon 6D takes 3 shots when I enable HDR and then I get one image. So I guess this is what you were talking about and the camera does it for me and improves the too dark and too light areas? (However i may need to get a tripod to stop blurring if it's taking 3 photos, even if I do use Auto Align)
I'm only just learning and getting to grips with using functions on a good camera from being a beginner, so I haven't a clue yet about Photoshop and Lightroom and the creative software stuff after taking the pics, although I believe there's some sort of HDR software for that? At the moment I just want the camera to do it for me.
I suppose with this post-shooting stuff I wouldn't need HDR within the camera - I could just take the same photo on different exposures mysefl and then just play around putting together the best exposures for the good bits.
I tried taking under and overexposed photos inside the canyon and than using panoramic stitching, but it seems panoramic stitching won't work with an identical scene - it only likes a bit of scene overlap from each image.
Highlight Tone Priority seems like another way to reduce the problem of the upper parts of the canyon walls becoming bleached out.
- Mark as New
- Bookmark
- Subscribe
- Mute
- Subscribe to RSS Feed
- Permalink
- Report Inappropriate Content
01-24-2014 08:13 PM
Camera makers have tried to simplify it by including the feature you have which obviously is a step in the right direction but for thiose more challenging situations a series of photos with each being a slightly different exposure will allow very precise editing via computer to get the absolute best result. That of course takes extra time & patience.
- Mark as New
- Bookmark
- Subscribe
- Mute
- Subscribe to RSS Feed
- Permalink
- Report Inappropriate Content
01-25-2014 05:56 AM
sorry just one other thing. I read that when using the HDR 3 shots on my camera I should use Auto Align if I don't have a tripod to try and eradicate any movement - but why would you ever NOT use Auto Align for HDR. Even if I do get a tripod can Auto Align do any harm ?
Presumably enabling Mirror Lockup is also a good idea to reduce any shake blur?
- Mark as New
- Bookmark
- Subscribe
- Mute
- Subscribe to RSS Feed
- Permalink
- Report Inappropriate Content
01-27-2014 05:29 PM
Weekend Travelers Blog | Eastern Sierra Fall Color Guide
- Mark as New
- Bookmark
- Subscribe
- Mute
- Subscribe to RSS Feed
- Permalink
- Report Inappropriate Content
02-11-2014 06:24 PM
If you use digital post-processing HDR to combine/overlay 3 images with different exposures which were taken WITHOUT a tripod, so your hand probably moved a tiny amount while the 3 were being taken, is the software's final HDR combined image slightly blurred because the 3 weren't perfectly aligned.
Or, does the post-processing software work like with panoramic stitching and combine the overlapping parts of 2 photos taken with your hand in fractionally different positions and merge it into one clear image without blur or silhouette.
When I used my Canon's in-built HDR to take hand-held shots, (it quickly takes 3 and makes them into one photo), the problem was distinct lines like the horizon and the ridge of a hill appeared twice, a fraction apart, on the final image, so my hand must have moved slightly and the two were overlayed.
But I don't get this when I panoramic stitch 2 shots where the same area is repeated, so I wondered if HDR achieved on a computer combines/merges without creating a slightly out of alignment "double image"?
- Mark as New
- Bookmark
- Subscribe
- Mute
- Subscribe to RSS Feed
- Permalink
- Report Inappropriate Content
02-11-2014 06:53 PM
I probably should have more accurately used the term ghosting, rather than blur or silhouette, in the previous post
- Mark as New
- Bookmark
- Subscribe
- Mute
- Subscribe to RSS Feed
- Permalink
- Report Inappropriate Content
02-15-2014 01:04 AM - edited 02-15-2014 01:10 AM
Hi,
There are several ways to do HDR...
One way is what you've been discussing: Take multiple shots at different exposures. (By the way.... Not limited to just three shots and they don't have to be one under, one over and one normally exposed either. There are times you might want two stops under, one stop under and a normal shot, for example.)
The multi-shot method works fine, so long as your subject is stationary. Any movement will cause problems and might show "ghosting" effects as you mention.
Another method is to take a single image and then multi-process it. Usually this is best done with RAW files, which have a lot more latitude for adjustment in post processing. Since only a single shot is taken, this can be done with moving subjects. There isn't as much opportunity to work really extreme situations, but it can be helpful in difficult lighting.
For example, to get the shot below I had no choice but to shoot from the shadowed side of the subject, while a number of white objects were "off the scale" at the other extreme. I couldn't use fill flash. So I just took the best exposure I could, then worked with it in post-processing. A simple "curves" correction of lightening of the midtones in a single image didn't work well. Instead I used the HDR techinique of "triple processing" the image (which is easy with RAW files in Lightroom, I just create a couple "virtual copies" at different exposure settings). I was not going for that "otherworldly" look of some HDR, wanted a realistic look, but with the shadow areas opened up.
I used these three versions of a single image...
And combined them using Photoshop's HDR Pro to make this final image...
This was optimized for printing, not for the Internet. But hopefully it can give you some idea of the possibilities.
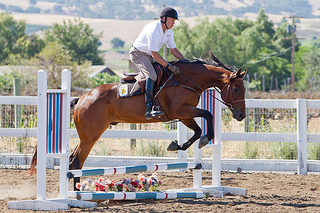
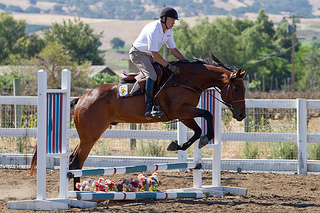
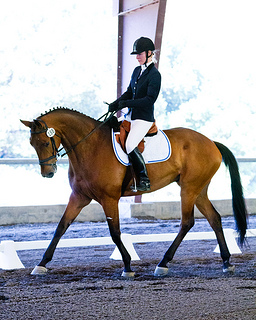
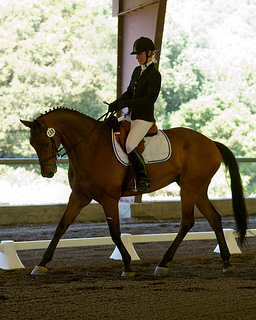
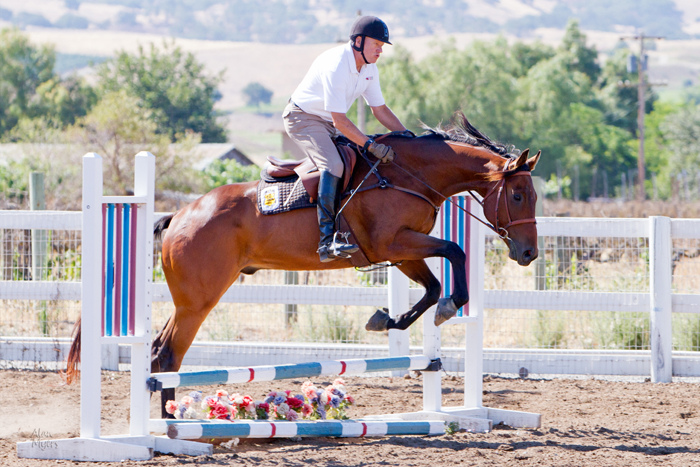
For the large part, Photoshop HDR Pro used for the above is automated. Other times I'll just combine two or three images manually. For example, very strong lighting outdoors combined with shaded, covered subjects makes the location in the image below difficult. I expose for the shadowed subjects in the covered arena, but when I make a final print I like to try to recover some of the outdoor background, too, so it doesn't just look completely "blown out".
These two versions of the single image are not only different exposure, but also use different color balance for indoors in the shade and outdoors in sunlight...
Combined manually into the final image...
Once again, this was optimized for printing, not the Internet... But hopefully gives you some ideas.
Joy of Photoshop!
I don't have a camera that can do in-camera HDR, wouldn't be likely to use it anyway. I believe it's done with 8 bit JPEGs, the above were done with 16 bit TIFFs which I think make for better image editing, then the final image was saved as an 8 bit JPEG to send to the printer.
Hope this helps!
***********
Alan Myers
San Jose, Calif., USA
"Walk softly and carry a big lens."
GEAR: 5DII, 7D(x2), 50D(x3), some other cameras, various lenses & accessories
FLICKR & PRINTROOM
11/20/2025: New firmware updates are available.
EOS R6 Mark III - Version 1.0.1
EOS R5 Mark II - Version 1.2.0
PowerShot G7 X Mark III - Version 1.4.0
PowerShot SX740 HS - Version 1.0.2
10/21/2025: Service Notice: To Users of the Compact Digital Camera PowerShot V1
10/15/2025: New firmware updates are available.
Speedlite EL-5 - Version 1.2.0
Speedlite EL-1 - Version 1.1.0
Speedlite Transmitter ST-E10 - Version 1.2.0
07/28/2025: Notice of Free Repair Service for the Mirrorless Camera EOS R50 (Black)
07/24/2025: New firmware updates are available.
07/23/2025: New firmware updates are available.
7/17/2025: New firmware updates are available.
05/21/2025: New firmware update available for EOS C500 Mark II - Version 1.1.5.1
02/20/2025: New firmware updates are available.
RF70-200mm F2.8 L IS USM Z - Version 1.0.6
RF24-105mm F2.8 L IS USM Z - Version 1.0.9
RF100-300mm F2.8 L IS USM - Version 1.0.8
RF50mm F1.4 L VCM - Version 1.0.2
RF24mm F1.4 L VCM - Version 1.0.3
01/22/2024: Canon Supports Disaster Relief Efforts in California
01/14/2025: Steps to resolve still image problem when using certain SanDisk SD cards with the Canon EOS R5 Mark II
- Possible 80D Pink Photos Solution in EOS DSLR & Mirrorless Cameras
- EOS R7: What is this dark area in my football photos? in EOS DSLR & Mirrorless Cameras
- EOS 70D High ISO required in bright daylight in EOS DSLR & Mirrorless Cameras
- CR2 Images Change Brightness When Viewed on Windows 11 in Camera Software
- EOS R7 Mark II "ideas discussion" in EOS DSLR & Mirrorless Cameras
Canon U.S.A Inc. All Rights Reserved. Reproduction in whole or part without permission is prohibited.
